.png?width=175&height=50&name=BF_Wordmark_Momentum_DarkBlue%20(1).png)
Bullfrog Spas use interchangeable JetPaks that sit in designated JetPak stations. Each JetPak connects directly to the spa’s plumbing system and is designed for easy removal and installation.
You may want to remove a JetPak to:
- Clean behind it
- Reposition it in a different seat
- Replace or upgrade it
- Access components during troubleshooting
- Turn off the jets
- Ensure the spa is powered on but idle (not actively running high-speed jets)
- Make sure hands are clean to avoid introducing debris
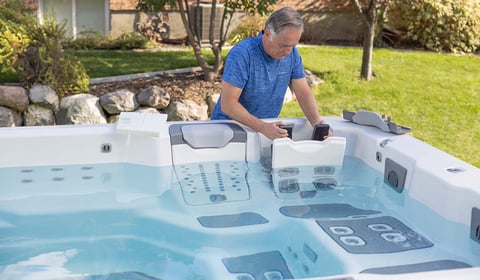
Step 1: Turn Off the Jets
Press the Jets button to make sure water is not actively flowing at high speed.
Step 2: Remove the Pillow/Snapcap
This will look a litte different depending on your model. Generally, the pillow or snap cap will unclip or slide off. Refer to your owner's manual or contact support for more help.
Step 3: Locate the JetPak Handle
Each JetPak has a built-in handle at the top.
Step 4: Push the JetPak Out, Then Straight Up
- Firmly grasp the handle
- Push the JetPak out to unclip it
- Lift straight upward
- You may feel slight resistance as it disconnects from the plumbing
Use steady, even pressure—no twisting or forcing.
Step 5: Clear the Bottom Connection
Once lifted:
- Tilt slightly if needed
- Pull the JetPak away from the seat
The JetPak will fully disconnect from the water manifold.
How to Install a JetPakStep 1: Align the Bottom Connection
- Position the JetPak above the JetPak station
- Align the bottom connection with the plumbing port
Proper alignment is key for a secure fit.
Step 2: Lower the JetPak Into Place
- Carefully lower the JetPak down
- Align with the manifold hook that clips into the back of the JetPak
- Push down and then back
- Ensure it sits flush against the back of the seat
Step 3: Press Firmly to Seat It
- Apply gentle downward pressure
- You should feel it settle securely into place
Step 4: Confirm Proper Fit
- The JetPak should sit flat and stable
- No gaps should be visible between the JetPak and seat
- It should not wobble or shift
Step 5: Test the Jets
- Turn the jets back on
- Confirm normal water flow
- Always install JetPaks while the spa is filled with water
- Avoid forcing connections—alignment should be smooth
- Periodically remove JetPaks to clean behind them
- Ensure the lower gasket/connection area is clean before reinstalling
JetPak won’t come out
- Ensure jets are off
- Use steady upward pressure
- Check for debris buildup around the base
JetPak won’t seat properly
- Re-check alignment with the bottom port
- Remove and reinstall slowly
- Inspect for obstructions
Weak or no jet pressure after reinstalling
- Confirm JetPak is fully seated
- Check that diverters are positioned correctly
- Inspect for an airlock if recently drained/refilled
Contact your authorized Bullfrog Spas dealer if:
- A JetPak will not remove or install properly
- You notice damage to the connection point
- Water leaks appear around the JetPak area
- Jet performance does not return after proper installation
When properly installed:
- JetPaks provide strong, consistent pressure
- Switching between JetPaks is quick and easy
- Your spa remains fully customizable
JetPaks are designed to give you complete control over your spa experience. With proper handling and installation, you can easily swap and maintain them to keep your spa performing at its best.